I had some folks who wanted a closer look at the mechanism.
Sunday, November 14, 2010


Ever wonder how Klingons cut down trees?
Well now you know. This public service announcement brought to you by Helm Enterprises, Silliness Division.
Saturday, November 13, 2010
Test run of the new power hammer
I finally got my new power hammer wired! This is its first run. It was built by the same cousin who built the hydraulic forging press. It's a modified Appalachian "Rusty" helve hammer utilitizing a spare tire clutch. Very little new material went into making it. It has an 80 pound ram and is running dies made from railroad track caps. More dies and a different die holding system in the future.
The test piece of steel is about 5/8" automobile coil spring.
The Hausmann Millworks mentioned in the video is the creative community where my shop is located, just north of downtown San Antonio, Texas.
The test piece of steel is about 5/8" automobile coil spring.
The Hausmann Millworks mentioned in the video is the creative community where my shop is located, just north of downtown San Antonio, Texas.
Friday, November 12, 2010
Custom bushcraft knife part 2
And today's update:
The knife taken out of the vinegar and washed off. The vinegar ate the scale off without really affecting the metal. The scale is harder than steel, so it would have worn my file out quickly and made it hard to do the work.

Clamped in the vise, filing the cutting edge. I forge as close as possible to my final shape, minimizing the amount of steel needed to be removed. I could grind what's needed, but I think the file marks go better aesthetically with the more primal look. Like the smoothness of your hammer marks shows your skill at the anvil, the evenness of your file marks shows your skill with a file. I'll be playing with grinding more in the future, and of course I do make satin finished blades now that use a lot of grinding to do, but when doing a forge finished blade, I tend to file my edges for now.

After bringing the edge down to the point where the next step in working the edge is a coarse whetrock, I file the choil. Some folks like choils, some don't. There are functional reasons for both schools of thought and aesthetic reasons as well. Mostly, I like the look of a good choil. It's a nice way to start the edge and not make a blade look like a stock removal project with a ricasso and plunge cut. If I'm making a forged blade, I don't see a reason to make it appear like it was gound from a bar. Well and good to those who do, or to those who are stock removal makers. It's just not the way I go. That's a half-round file I'm using to do this.

Then I clean up the shoulders at the tang/blade transition. Slightly rounded to keep stress risers down. On my small knives, the transition from the tang to the blade is the thickest part of the steel. It tapers distally from there to the point and to the end of the tang. This helps eliminate weakness at this vulnerable area. It also helps keep the balance even between the blade and the handle. Since the tang will be hidden in the wood, I do some grinding here to speed up the work. The grinding marks won't show, and actually provide more surface area later on for the epoxy to grip. Here it is ready to heat treat.

Some steels benefit from multipe heat treatment cycles, others don't. 5160, which is what the spring steel probably is, does benefit. I hardened this one three times by heating it in the tomato can gas forge and quenching in vegetable oil. Veggie oil works about the same as commercial quench oil and is non-toxic. Check for warps and for hardening with a file, then do the next cycle. Each time I quench is at a slightly lower temperature. I differentially harden small blades with an edge quench, giving a hard edge and springy spine. Also, I harden the tip a little softer than the rest of the edge and a little harder than the spine. The tip can undergo a lot of stress, and making it a bit softer will make it a lot tougher and less likely to break when stressed. A few minutes on a whetrock and you'l have it back, rather than having to get the blade re-profiled because the tip snapped off.


You can see the flames coming out of the forge from the oil burning off after the first quench.

After the third quench, I leave it in the oil a few minutes. Then I pull it, do a final check for warps, wipe it down, and sand off the worst of the baked-on oil. No shot of it post-sanding, but here it is post-wipe-down.


Finally, I draw temper in my high-dollar Wal*Mart toaster oven heat treatment furnace. It's now ready for me to do some more cleanup and start fitting the bolster.
The knife taken out of the vinegar and washed off. The vinegar ate the scale off without really affecting the metal. The scale is harder than steel, so it would have worn my file out quickly and made it hard to do the work.

Clamped in the vise, filing the cutting edge. I forge as close as possible to my final shape, minimizing the amount of steel needed to be removed. I could grind what's needed, but I think the file marks go better aesthetically with the more primal look. Like the smoothness of your hammer marks shows your skill at the anvil, the evenness of your file marks shows your skill with a file. I'll be playing with grinding more in the future, and of course I do make satin finished blades now that use a lot of grinding to do, but when doing a forge finished blade, I tend to file my edges for now.

After bringing the edge down to the point where the next step in working the edge is a coarse whetrock, I file the choil. Some folks like choils, some don't. There are functional reasons for both schools of thought and aesthetic reasons as well. Mostly, I like the look of a good choil. It's a nice way to start the edge and not make a blade look like a stock removal project with a ricasso and plunge cut. If I'm making a forged blade, I don't see a reason to make it appear like it was gound from a bar. Well and good to those who do, or to those who are stock removal makers. It's just not the way I go. That's a half-round file I'm using to do this.

Then I clean up the shoulders at the tang/blade transition. Slightly rounded to keep stress risers down. On my small knives, the transition from the tang to the blade is the thickest part of the steel. It tapers distally from there to the point and to the end of the tang. This helps eliminate weakness at this vulnerable area. It also helps keep the balance even between the blade and the handle. Since the tang will be hidden in the wood, I do some grinding here to speed up the work. The grinding marks won't show, and actually provide more surface area later on for the epoxy to grip. Here it is ready to heat treat.

Some steels benefit from multipe heat treatment cycles, others don't. 5160, which is what the spring steel probably is, does benefit. I hardened this one three times by heating it in the tomato can gas forge and quenching in vegetable oil. Veggie oil works about the same as commercial quench oil and is non-toxic. Check for warps and for hardening with a file, then do the next cycle. Each time I quench is at a slightly lower temperature. I differentially harden small blades with an edge quench, giving a hard edge and springy spine. Also, I harden the tip a little softer than the rest of the edge and a little harder than the spine. The tip can undergo a lot of stress, and making it a bit softer will make it a lot tougher and less likely to break when stressed. A few minutes on a whetrock and you'l have it back, rather than having to get the blade re-profiled because the tip snapped off.


You can see the flames coming out of the forge from the oil burning off after the first quench.

After the third quench, I leave it in the oil a few minutes. Then I pull it, do a final check for warps, wipe it down, and sand off the worst of the baked-on oil. No shot of it post-sanding, but here it is post-wipe-down.


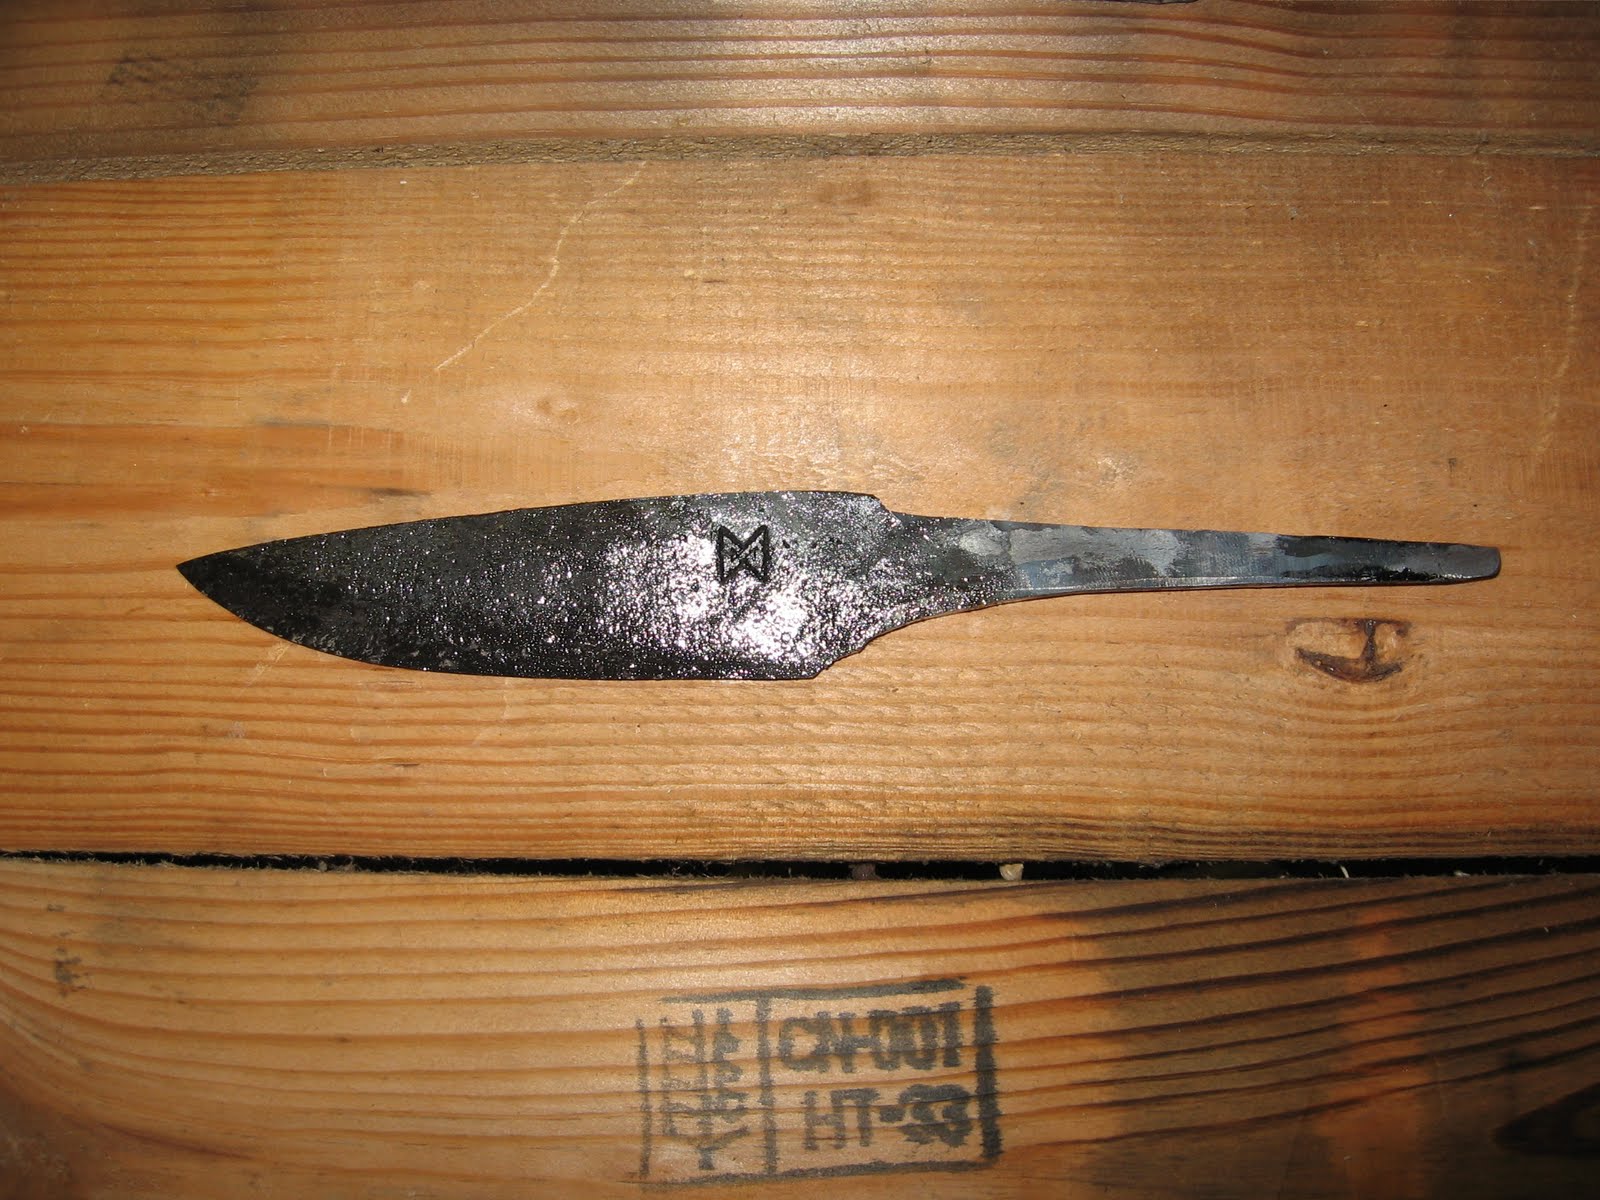
Finally, I draw temper in my high-dollar Wal*Mart toaster oven heat treatment furnace. It's now ready for me to do some more cleanup and start fitting the bolster.
Thursday, November 11, 2010
Custom bushcraft knife work in progress
A while back I was contacted by a member of Zombie Squad to have a custom bushcraft/general utility knife made, using the puuko design as our starting point. He showed me some pictures he'd collected off the Interwebz with knife features he liked, I made some sketches, and we agreed on design and price. I started work on it this week. I asked if he would mind me documenting the process, and he said go for it.
This is the sketch that this is all based on. There may be a few changes as the actualy knife is being made (as you'll see), but this is our guide.

The blade began life as a piece of pickup leaf spring. It was actually a relatively small scrap from me cutting out a blade blank earlier. After cleaning up the torch marks with my angle grinder and cutting it to length, I put it in my coffee can forge and commenced to hammering it into shape. I consulted with the sketch and got it fairly close. After cleanup grinding, I found that the angle of the tang to the blade needed changed, I needed to draw the length of the tang out some, and the blade was a half inch longer than the sketch.
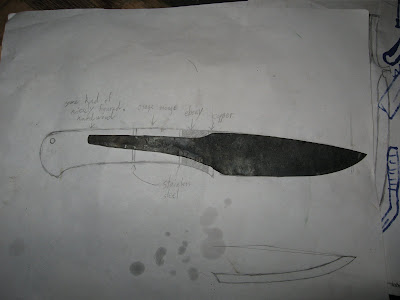
I checked with the customer, who said to go ahead with the length the blade had turned out to be. If he had wanted it shortened down to match the sketch, I would have taken some of the blade to forge the tang longer. After tweaking, this is what I ended up with:

The blade is soaking in vinegar to eat the scale off. Should be ready to file the edge tomorrow.
This is the sketch that this is all based on. There may be a few changes as the actualy knife is being made (as you'll see), but this is our guide.

The blade began life as a piece of pickup leaf spring. It was actually a relatively small scrap from me cutting out a blade blank earlier. After cleaning up the torch marks with my angle grinder and cutting it to length, I put it in my coffee can forge and commenced to hammering it into shape. I consulted with the sketch and got it fairly close. After cleanup grinding, I found that the angle of the tang to the blade needed changed, I needed to draw the length of the tang out some, and the blade was a half inch longer than the sketch.

I checked with the customer, who said to go ahead with the length the blade had turned out to be. If he had wanted it shortened down to match the sketch, I would have taken some of the blade to forge the tang longer. After tweaking, this is what I ended up with:

The blade is soaking in vinegar to eat the scale off. Should be ready to file the edge tomorrow.
Sunday, November 7, 2010
One Night Art Show
If you live in the San Antonio area, please come to a one night only event: an art show hosted by Michael Imbimbo Inc. Architects (the fellow for whom I'm making the sheet metal stakes) and celebrating the artists of the Hausmann Millworks (which is where my shop is located).
Time: Tuesday, November 9th from 5:30 to 8:30
Place: The Frost Bank Building at Thousand Oaks and US HWY 281
Featured artists:
Rex Hausmann - painter
David Almaguer - stencil artist
Duane E. Hilburn - painter
Jake Stanley - graphic artist
James Helm - blacksmith and sculptor (that's me!)
Kirk Forster - painter
Fernando Andrade - painter and sculptor
Mark Andrew Gelatt, Jr. - sculptor
Also featuring the artwork of Mike Imbimbo, ranging from silk prints to ceramics to raised metal vessels.
Hors d'oerves and drinks.
For more information, contact Lee Imbimbo at: lee.imbimbo@michaelimbimbo.com
Hope to see y'all there!
Time: Tuesday, November 9th from 5:30 to 8:30
Place: The Frost Bank Building at Thousand Oaks and US HWY 281
Featured artists:
Rex Hausmann - painter
David Almaguer - stencil artist
Duane E. Hilburn - painter
Jake Stanley - graphic artist
James Helm - blacksmith and sculptor (that's me!)
Kirk Forster - painter
Fernando Andrade - painter and sculptor
Mark Andrew Gelatt, Jr. - sculptor
Also featuring the artwork of Mike Imbimbo, ranging from silk prints to ceramics to raised metal vessels.
Hors d'oerves and drinks.
For more information, contact Lee Imbimbo at: lee.imbimbo@michaelimbimbo.com
Hope to see y'all there!
Mini-stake and holder
.JPG)
This is the next stake that the architect who ordered the custom sheet metal stake from me needed. This is his idea, a design for working inside a deep vessel.
.JPG)

.JPG)
The holder is clamped in a vise, just like the previous stake. At the opposite end, the bar is forged and machined to half the original size and a hole is drilled and tapped. Then the mini-stake is bolted on and set at the appropriate angle. The angle can be adjusted as need be, and a variety of differently-shaped mini-stakes can be used.
The holder and stem of the mini-stake are mild steel, while the stake itself is hardened and tempered 4140. More of these will be coming.
Subscribe to:
Posts (Atom)


