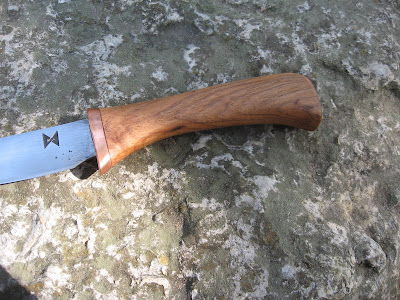
Time for the handle. First off, I cut out the piece I'm going to use from the main block. The first layer in the handle is Filipino ebony.

Then I smooth up the sides and get everything as flat as I can. I use a variety of tools for this, but primarily use wood rasps and my belt grinder. I did try this Harbor Freight mini-plane for the first time. It actually did all right.


After the ends are flat, I drill the hole for the tang and widen it out with a mortising chisel I made form a hay rake tine.

Once it fits right, on to the next layer: osage orange, a.k.a. bois d'arc or the Texanized "bodark". You can see that it starts lemon yellow and ages to a burnt orange.

The same process is followed. Afterwards, I fitted two stainless steel spacers, which was all kinds of not-fun. I finally got them to work out, though, and moved on to the end piece, some desert ironwood. This is very hard, dense, beautiful, and on the expensive side. I think I actually ended up using a piece out of another chunk that I had, but this gives you some idea.


After some initial shaping to cut down on the work needed done after the epoxy has set, here's everything dry-fitted. I am working with the angled saw cut on the ironwood. It's coming out a bit differnt of a handle shape than I drew, but it'll be nice and comfortable once I've shaped it down.

I went ahead and rasped down some of the bulge on the Filipino ebony with a rasp.

Then I took everything apart and cleaned it with rubbing alcohol. I roughed up the tang with a file, giving plenty of surface area for the epoxy to stick to.

I mixed the epoxy on a slick piece of paper (actually a left-over invitation to an art show for one of the artists at the Hausmann Millworks where my shop is located - it was his suggestion) with a little piece of wood I cut. I made sure that each surface was well-slathered with epoxy, applied epoxy to the tang, and let the epoxy run into the tang-holes of each piece of wood. I popped air bubbles in the epoxy of the end-piece, making sure it was filled before I stuck it on the end of the tang.

Finally, I used two blocks of wood and the cross slide table of my Grizzly benchtop mill/drill to compress everything together and hold it overnight. I've never tried this before. I think I like this approach, although a carpenter's clamp might be easier. I actually saw someone post a picture recently doing the same thing using a caulk gun and a block of wood to clamp.

Alcohol-soaked paper towels helped clean up excess epoxy. Tomorrow I'll work on shaping the handle.


