The majority of what I make these days is bladed tools: knives, axes, bush swords. There are a variety of different approaches to making blades, and each knifemaker worth their salt has specific reasons for choosing to work the way they do. Blademaking is a total package, and a blade that is lacking in one area will not be a good tool even if the other areas are fine. I strive to make tools that function very well and are aesthetically pleasing, and I feel that an informed customer is more appreciative of having a well-made tool. So here is my process and my rationale behind what I make.
Steel Selection:
The foundation of a good blade is good steel. Care must be taken to match the needs of the blade and the skills of the knifemaker with the appropriate steel. There are a lot of folks who dabble a bit in knifemaking and I have encountered a goodly handful of them while manning my table at gun shows. I have had a number of them who proudly named out a particular alloy they chose to make their blade from (D2 seems to be a common buzzword) only to become confused when I ask them how they heat treat the finished blade. It doesn't matter what kind of super alloy you have in a blade, if it isn't properly heat treated, it will not perform well and isn't a good blade.
There are many alloys available today which offer tremendous performance in various areas of knife usage, whether it be toughness, edge retention, stain resistance, etc. It is always a balancing act with the various properties: an alloy that holds its edge an exceptionally long time may also be more brittle and chip out under stress; it also tends to be more difficult to resharpen when it does finally dull. An alloy that chops through hardwood knots without chipping out may need its edge touched up more frequently. A knifemaker decides what properties are most important for the task at hand and chooses his steel accordingly.
Part of the consideration in a knifemaker's choice is available equipment and methods for heat treatment. A steel that requires precise heat treatment will not perform to its full potential without using a heat treatment furnace with the appropriate ramp times, temperatures, and soak times programmed. Each alloy has its own ideal process and some are rather complex. Many knifemakers get around this aspect by farming out their heat treatment to professionals.
I like to have control over how my blades are heat treated. In spite of the plethora of latest-and-greatest steels available on the market that strive to push the envelope in various areas of performance, simple carbon steels that can be heat treated by eye and by magnet can perform astoundingly well if they are heat treated by someone with a bit of experience and a careful hand. A good high-90s% of people, including hunters and soldiers, will be well served in their blade needs by a properly heat treated blade of simple carbon steel.


My steel of choice for most blades is 5160, a spring steel that has chromium added for hardenability. 1060 plain carbon steel and 5160 both have .6% of carbon, but the 5160 will get harder and retain a cutting edge better. It gives excellent performance out of a simple heat treatment and is forgiving if the temperatures are not exact. 5160 is well known for its toughness (understandable, given that it has been used in automobile springs for decades) and will hold an edge quite well (though not as well as some other alloys) and is easy to resharpen when the time comes.
I also am playing with 1084, a plain carbon steel that too provides excellent performance with a simple heat treatment, though the balance of properties tips a bit more to edge retention and a bit less to toughness. That being said, it is an excellent steel for Bowie-sized and smaller blades.
For my axes, I use 4140, a very tough steel used in applications that need to take impact without failure. To put this in perspective, the dies for my 100 pound ram power hammer were made by me (with some help from a machinist on the rough shaping) from 4140 and heat treated by me. I use my power hammer on a nearly daily basis and the dies have given me no trouble, nor deformation. I build my axes to cut hardwoods and survive the occasional missed stroke that splits up a chunk of rock without destroying the edge. You may lose a few small chips if you hit flint, but you'll be able to keep working the rest of the day and the chips will sharpen out fairly quickly.
Shaping:
Knives can be made in a couple of basic ways: stock removal and forging. Stock removal is analagous to whittling, where a chunk of material has pieces removed until the desired shape remains. In knifemaking, this is typically done by grinding. Forging is analagous to squeezing clay, using pressure to squish the steel around into the desired shape. Usually the steel is heated to soften it, then it is hammered into shape or squeezed in a press.

Both shaping methods produce excellent blades if done correctly and terrible blades if done incorrectly. I come to knifemaking from a blacksmithing perspective, so I choose to forge my blades. I like to manipulate a piece of steel from one form to another using my hammer; I can think that way better than I can by grinding. Forging also opens up the possibilities more; it would be more difficult and require much more time and steel to make an ax by machining it from a billet than it does to hammer it into shape from a bar and then clean it up by grinding. If a person is set up to forge, they are set up to heat treat; the same is not true with stock removal (although vast numbers of stock removal knifemakers do their own heat treatment; heat treatment is not inherent to stock removal but it is to forging).

Any knife will need some level of stock removal, though. If nothing else, sharpening the blade on a whet rock removes steel through abrasion and is technically stock removal. Most knifemakers who forge will grind their blades completely smooth when they are finished, leaving no evidence it was ever hammered into shape and leaving the knife indistinguishable from one that was ground from a bar. There are a growing number of knifemakers, including myself, who like to acknowledge that the steel was shaped by hammer by leaving the forged texture on the blade to varying amounts. I typically forge as close to my final dimensions as I can reasonably do, clean up my profile by grinding, then use files to shape the primary bevel. After heat treatment I use a fine belt on my belt grinder and whet rocks to give the blade its secondary bevel.
There are a variety of bevel types that knifemakers use (hollow grind, convex grind, flat grind, scandi or zero grind, chisel grind, combinations thereof), each with its own advantages and disadvantages. I use what might be termed a full flat grind, though I achieve my cross section by forging and filing much more than I do by grinding. In other words, the spine is the thickest part of the blade and it tapers to the cutting edge (or secondary bevel)from there. The part of the bevel that is filed is simply refined and thinned by the file and there is usually not a large difference in the angle of the filed section and that of the forged section.
I chose the full flat grind because it balances quite well in the vast majority of cutting tasks, in my experience. It is thin enough to handle most fine cutting tasks, while still being strong enough to handle a good bit of stress. The same blade can both shave hair and chop through an oak branch.
Heat Treatment:
The properties of the steel derive from the crystalline structure of the steel, which can be manipulated by heat. All steel is crystalline in its solid state, though the crystals are microscopic. However, if you break off a piece of steel, you can observe its grain, or how the crystals group together, and can tell a good deal about what is going on inside it.
All else being equal (alloy, cross section, even Rockwell hardness) a blade with smaller grain will be tougher and less prone to breaking than a blade with larger grain. The grain grows larger over time while heating, especially if the steel is overheated. To refine the grain smaller and tougher, once I am through with forging the blade I triple normalize it. That is to say, I heat the steel above the point it no longer sticks to a magnet and just a bit more, then let it air cool until there is no longer any heat color in the metal while holding it in dim light. Then I do it again and yet a third time. Each time, the grain is refined smaller and stresses that may have built up during the forging process are relieved. To see a very convincing demonstration of the benefits of normalizing, check this out:
Normalization Experiment
After I am through doing my stock removal, I heat treat the blade. The heat treatment consists of hardening and tempering. In simple terms, the harder the steel gets, the better it will hold an edge but the more brittle it will be and likely to break under stress. A blade that is hardened but not tempered will break if you drop it. After hardening, the blade is tempered, which takes out some of the excess hardness and makes the blade tough and able to resist breaking.
To harden, the steel is heated to the point that it no longer sticks to a magnet and then a bit hotter. This is somewhere above 1340 degrees and can vary a bit depending on alloy. It is then quickly cooled by quenching in either water or oil typically. All else being equal, the steel that is cooled more quickly will harden more. It is possible to cool too quickly, causing the blade to crack from internal stress. Oil is a slower quench than water, but is plenty fast enough to harden the steels I use. Oil is also less stressful on the steel; I don't think I've ever had a blade crack during an oil quench.
After the quench, the steel is then heated back up a bit to temper it. This is typically in the 350 to 700 degree Fahrenheit range, varying depending on alloy and hardness desired. An ax that must survive extreme impact will be tempered at a hotter temperature than a razor that does fine cutting, and will therefore be tougher but will not hold a fine edge for as long.
In practical terms, for a 5160 blade I will heat it to the appropriate temperature above non-magnetic and quench in canola oil for about twenty to thirty seconds. Canola is a fast-quenching oil, though not as fast as some of the others. It hardens the steel very well but is not overly stressful on the steel during the quench. It also does not leave toxic residues or make toxic smoke like some of the other quench oils.
I often differentially harden by quenching the blade deep, then bringing the spine out of the oil while leaving the edge submerged. This, along with the difference in the thermal mass from the spine to the edge, means that the spine cools more slowly and ends up tougher than the edge. This helps make for a tougher blade that still holds its edge well.

After the quench, I check with a file to see that it skates off rather than bites in, indicating it hardened well. I then check for straightness and will adjust any warps during the limited window of time before the grain sets up fully (around thirty seconds after pulling it out of the oil). I then heat the blade again above non-magnetic and quench again, then go through the process a third time. Not all alloys benefit from a multiple quench, and there is a bit of debate over whether there's any benefit or if it's hocuspocus. I do it as a way of being cautious and thorough, allowing the carbides in the 5160 to get into solution better without overheating the steel and causing problems. I don't do the triple quench with 1084, which does not show any benefit. It may be a bit of overkill on my part to triple quench 5160, but I have not had any complaints from customers in the way their 5160 blades have performed.
After the quenching process, I wipe the oil off the blade and put it in my shop's toaster oven or my electric kiln. I use the kiln to heat treat long blades and anything that needs to get hotter than the toaster oven's 475 degree maximum temperature, such as axes which are tempered between 535 and 600 degrees Fahrenheit. I temper for an hour, let the steel cool, temper again for an hour, let the steel cool, and temper for a third hour. For most blades made from 5160 and 1084, I temper at 400 degrees.
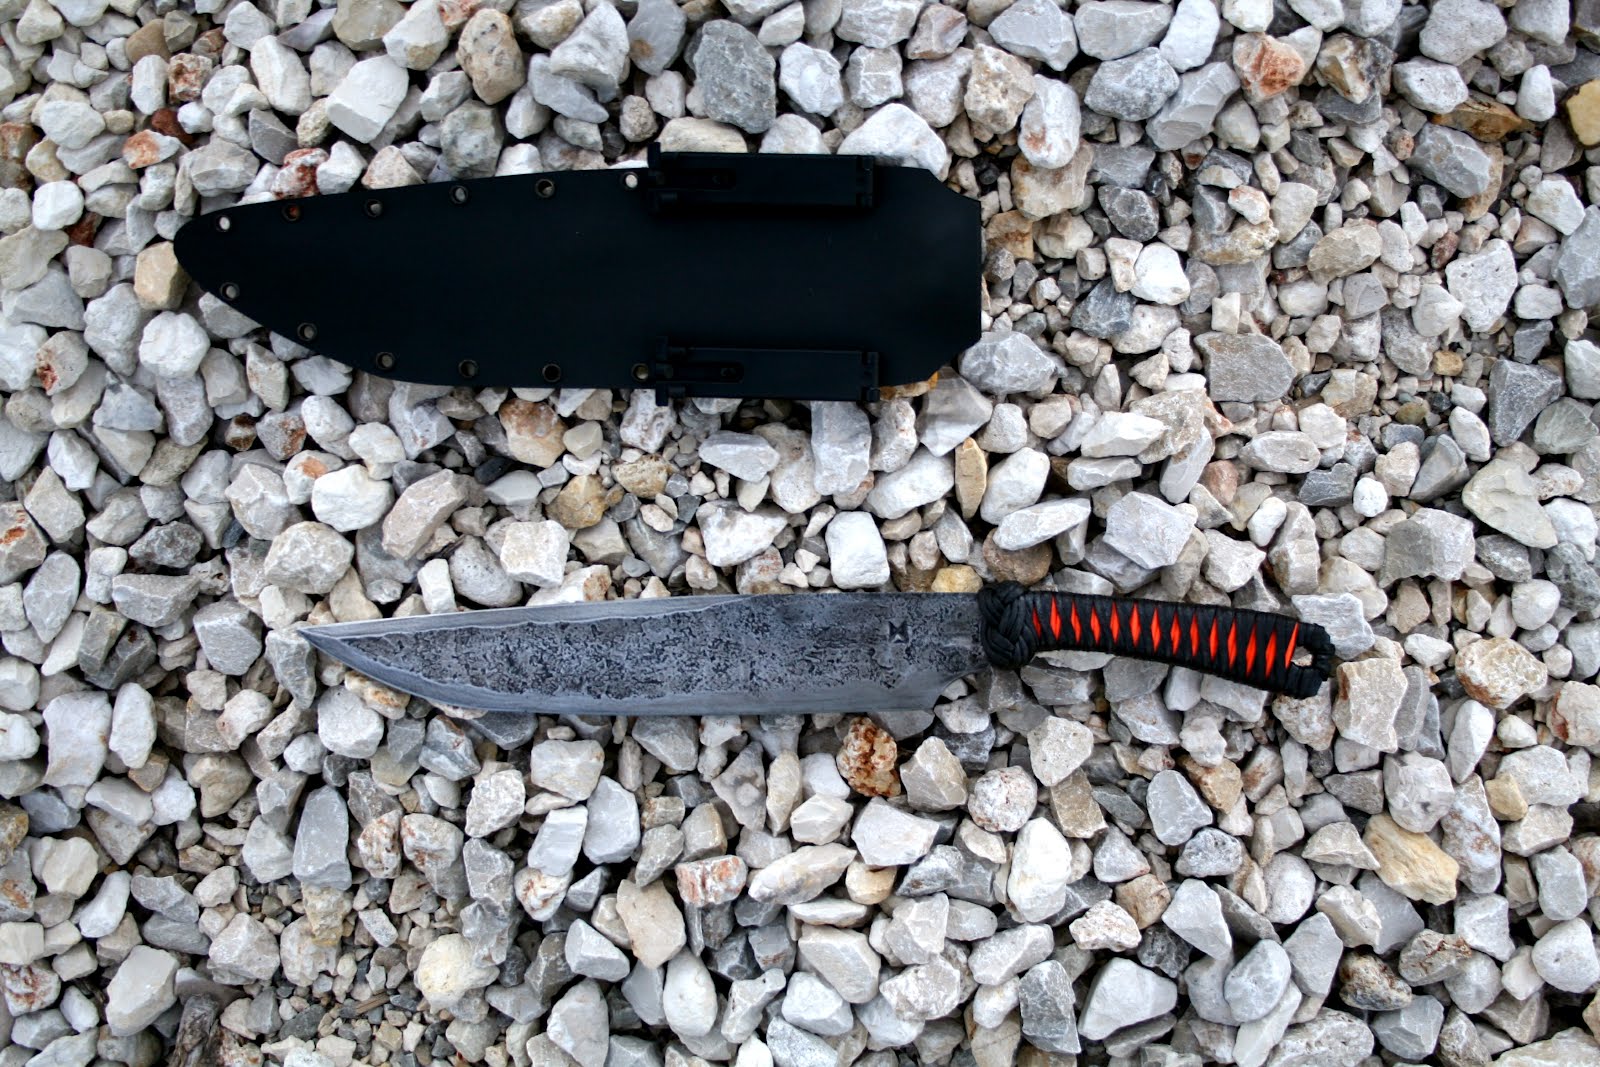
So when I mention in a post about my "typical triple normalization, triple quench, triple tempering", this is the process to which I am referring. To get an idea of the kind of performance this simple heat treatment gives, check out how the knife I made for the airman to take through SERE training did:
Primal/Tactical SERE Knife
Post Heat Treatment:
After heat treatment, I clean off the remaining oil from the blade and do my handle then sharpen. You can see my basic sharpening process in the link on the upper right hand side of the screen.


I do a variety of handle treatments, but I most commonly use some form of cord wrap. I consider a cord wrap to be a way to make a composite material in place on the handle and not a method of storing extra cord for emergency usage. I don't like to compromise the utility of your most basic tool for the dubious benefit of using the knife as an emergency supply storage. If using the knife as a basis for a survival system (which I *do* think is a good idea), I think it makes a lot more sense to use the sheath as a platform to attach a personal survival kit and to carry extra cordage. It lets you carry much more gear than you could on the knife itself, makes it easier to access, is unlikely to be absent if you have your knife (you're more likely to lose the knife and still have the sheath on your belt than vice versa), and most importantly does not mess around with the knife in a way that compromises how well it works as a knife.
So my cord wraps are permanently sealed and become part of the overall knife. When using natural cord for the wrap, I like to use shellac as the sealer. Shellac is made from insect hulls dissolved in alcohol and is so non-toxic that it has been used for years as a coating on pills and candy to keep the moisture out. The shellac I use is dissolved in denatured alcohol, so I wouldn't recommend drinking it, but once dry, it's not a problem. I like using a natural sealer for natural wraps.
When using synthetic cord, I seal it with synthetic sealer. For instance, when using paracord on handles, I brush on Minwax Wood Hardener. This is used by many knifemakers to home stabilize wood and other handle materials. It's as thin as water and is wicked down into the core of the cord instantly. I keep brushing more on until it is saturated, then let it dry. It becomes hard and durable at that point.
I like to use Turk's head knots to finish off the end of my wraps. They make for an interesting visal terminus, help anchor the end of the cord wrap, and sometimes provide a bit of a guard. The method I use for tying them can be found here:
Turk's Head Knot
I like cord wraps for both aesthetics and comfort. I may not get particularly complex with my handle shapes, but I do make them comfortable. Personal taste will vary on what feels good in the hand, of course, but I have had more than one customer who commented that their wife or girlfriend with much smaller hands found the knife just as comfortable to use as they did.
Balance:
I see no reason to make a tool heavier than it needs to be. One sign of a skilled knifemaker is the ability to make a large knife with a stout spine that is still light and feels lively in the hand.
A blade that is too heavy, especially one that is used for chopping, makes you expend more energy for less work. There is a happy medium between weight for inertia to bite deep with each chop and lightness for speed. A little weight helps cut well, but speed is the more important factor in the equation. A blade that is too heavy causes you to waste your energy in overcoming its inertia, and does not accelerate fast enough to cut well.
A knife that is balanced to be blade-heavy will be a more powerful chopper. The further forward that balance is, the more difficult it becomes to control and the more you are fighting inertia to swing it effectively. The further back the balance is, the quicker it is in the hand but the less well it will chop. So the ideal balance for a chopper is a few inches ahead of the handle.
For smaller knives that will not be used for chopping, staying lively in the hand is important. Putting the balance at the blade/handle transition point is fairly ideal for a general-use knife. Knives that are handle-heavy tend to be specifically for fighting (such as the infamous Fairbairn-Sykes commando dagger) or to have small, specialized blades.
Aesthetics:
I have a hard time appreciating something like a knife or a car if I can't picture using it. I would rather drive a 1970 El Camino than a Dodge Viper. Part of the appeal is the practicality. If I'm too worried about the gas mileage or scratching a mirror finish, I am much less likely to use the item in question.
So to me for a blade to be truly appealing I have to be able to visualize using it. Form follows function, therefore to me at least, some of the beauty derives from utility.
A well-made, well-functioning tool will be beautiful because it is well-made and well-functioning.
My eye goes first to the overall flow of lines, and there a knife's greatest beauty lies. All of the pattern-welded steel, gold inlay, mammoth ivory, and engraving will not make a knife with bad proportions or flow of lines be beautiful to me. I will appreciate the skill that went into making it, but I will not appreciate the knife.
I also enjoy literature, poetry, artifacts, ideas, and evocations that are timeless, that cannot be pinned down to simply being a typical example of late 20th and early 21st century thought and craftsmanship. I prefer to file my bevels in large part because the lines of the file teeth match up better with the timelessness of the forge finish than do belt grinder marks.
I don't want to make a knife just like everyone else; Bob Loveless and William Wales Scagel made enough knives and I don't need to add to that number. Many different knifemakers have influenced me in style and methods, but nothing I make is a direct copy of someone else's style. Tai Goo and Tim Lively are the two biggest influences, but my work would not be confused for either gentleman's.
Taking all of that into consideration, my focus as a knifemaker is making a knife that functions very well, is beautiful to the eye and comfortable to the hand, hefts well, and will serve its owner in the tasks it's put to while being visually interesting.